Follow Lilach
How to simplify your social media approval workflow
Whenever there’s more than one person managing a social media account – or several accounts – problems are bound to arise almost inevitably. From the initial stages of planning out your content to actually scheduling out that content, there are numerous steps to take that can easily overwhelm and confuse.
In this blog post, I’m going to show you how to simplify your social media approval workflow.
It will not only save you time but also quite a few headaches ☺
What does a social media approval workflow look like and why do you need one?
You can build your own workflow to suit your particular needs, but generally, there are several important steps that you need to take:
- Put together your team and establish roles: whether you’re a brand or on an agency, if you collaborate with a manager and even a team you need to be very clear from the start over who does what. For example, some would only create content but not have the power to actually approve or publish that content. Someone else would check and edit updates. Another person (manager, client) would approve the updates to be scheduled or published.
- Setting goals: the manager or client should consider the goals they want to achieve and based on that, provide the rest of the team with a clear brief. This then leads to…
- Brainstorming session: once you know what you want to achieve, the team can get together to brainstorm content ideas in one go. This is a great time-saver and it will help you plan out your strategy based on your objectives
- Assigning tasks: the manager should assign tasks appropriately so that everyone knows what they need to do (what types of content to create, what the deadlines are, etc.)
- Create content: time for the content creators to propose their ideas based on the objectives and brainstorming session
- Check content: the “editor” should then go through the proposed updates and either edit them, remove them, or approve them
- Schedule and publish updates: if anyone else needs to check the content before it’s published (for example, a client) this is the moment to share with them the final draft
How to create a smooth-running approval workflow with Kontentino
Because managing a social media workflow is such a struggle for many – particularly agencies – there are thankfully tools to help you overcome this challenge.
And one of the top tools for setting up a social media approval workflow is Kontentino – a very easy to use social media calendar with powerful features for teams, agencies and brands (some of the brands who use them include Nestle, IKEA and Saatchi & Saatchi!).
Here’s how it works.
Getting started with Kontentino
Kontentino is a social media calendar for teams; it’s perfect for building an intuitive and easy-to-follow approval workflow as you can add multiple team members, assign tasks and control what users can do. That said, this is just a very quick overview of its capabilities – there’s much more worth exploring, which I’ll get into now.
To get started with Kontentino, you should first make your settings.
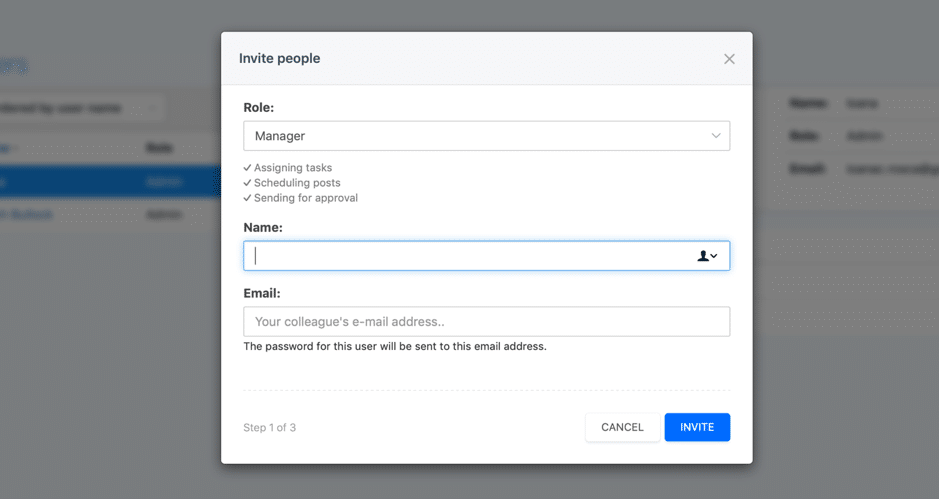
For example, adding team members to the platform:
There are a few different role options, each with their own specifics:
- Media agency: can overview content and analyse performance
- Translator: can be assigned tasks and add translations to posts
- Designer: be assigned tasks and can upload assets to posts
- Client: can review posts and upload assets into albums
- Manager: can assign tasks, schedule posts and send posts for approval
- Superadmin: as per their name, they can do pretty much anything they want from taking a managerial role to handling billing and company settings
By assigning the appropriate role to each member of your team, you’re not only helping to make clear what they need to do and what their tasks are, but you’re also simplifying the entire process. Everyone can simply focus on what they need to do and rest assured that the rest of the team is up to their tasks as well.
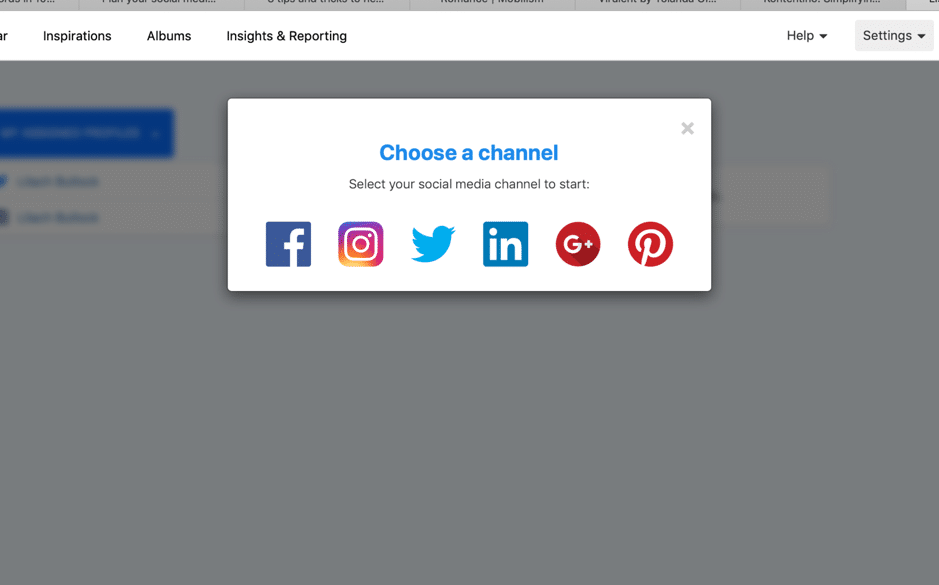
Once you’ve added the team members you want to your profile you can also add your social media channels:
As you can see, Kontentino works with all major social networks so you can manage your entire social media from one place.
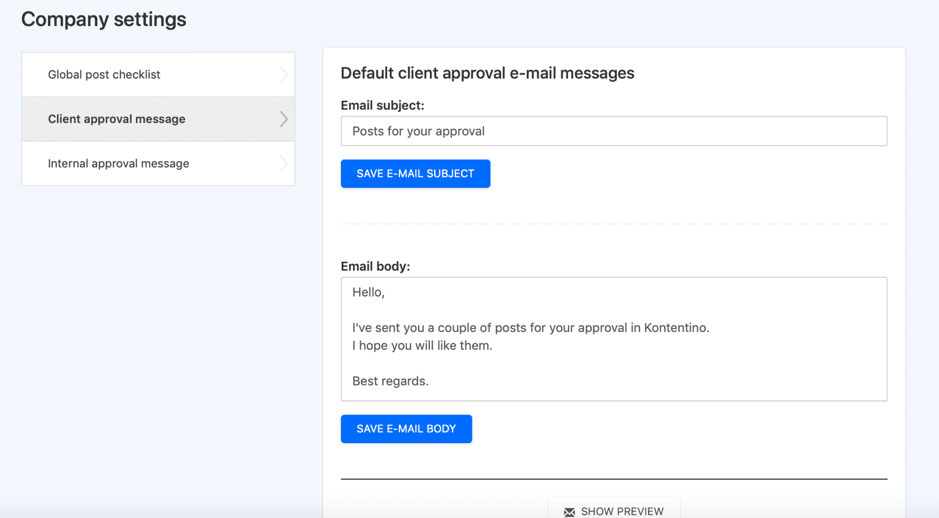
One very cool feature that I really love is that you can save and automate approval messages, both for clients and for internal use:
Once they get a notification, the client will be able to see the specific posts that require their attention and then make any notes or suggestions, or approve them directly: they’ll get push notifications to let them know so that they can check and approve both on desktop and on mobile devices, via the mobile app.
The Kontentino social media calendar
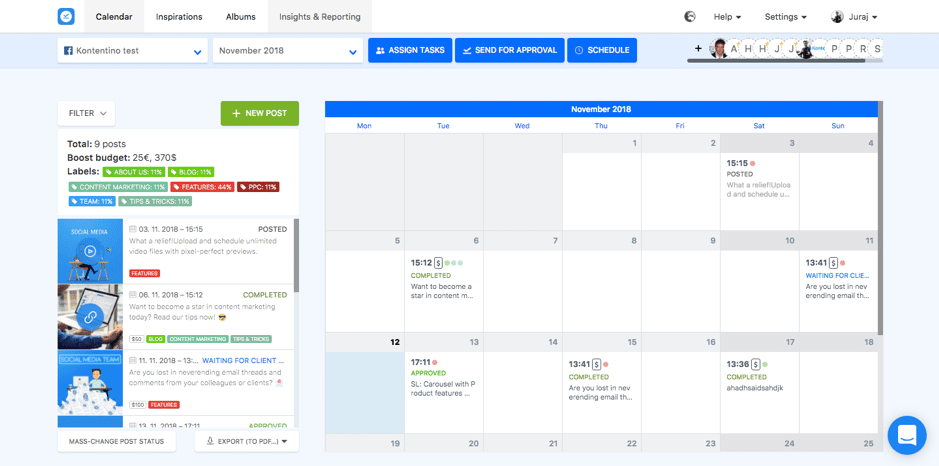
The first you thing you see when you log into your Kontentino account is a dashboard with your upcoming posts for the day and upcoming days, an overview of your (and your entire teams’) tasks, as well as a list of your social media profiles.
But, in order to have any content to show, you first need to start planning and populating your calendar.
You can visualize your calendar for one specific social account or for several at the same time (just select the accounts you want to see).
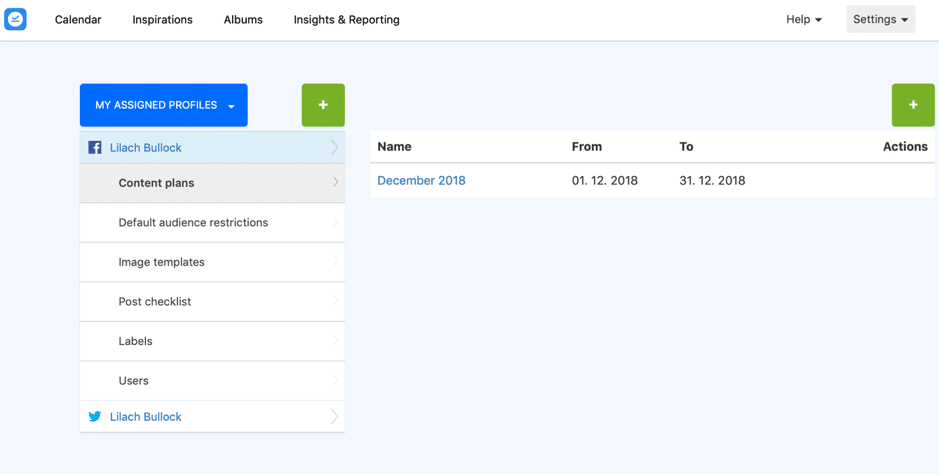
Plus, before you start publishing, you can also organize each social media profile in your list with labels, image templates and more:
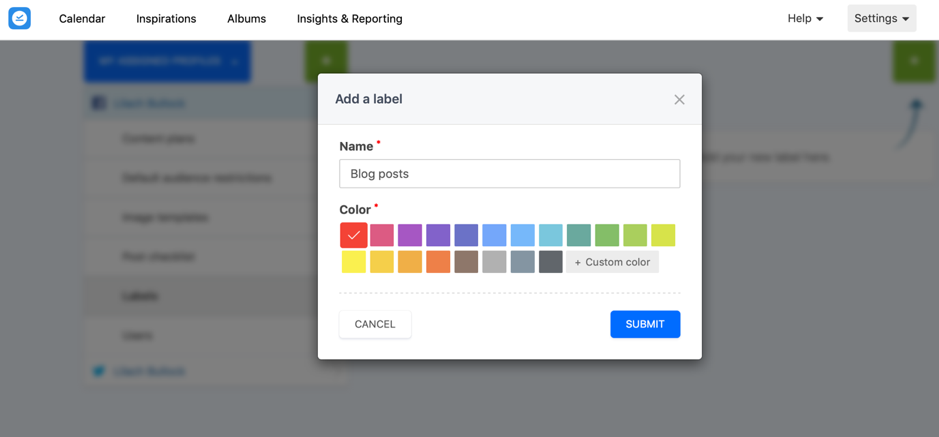
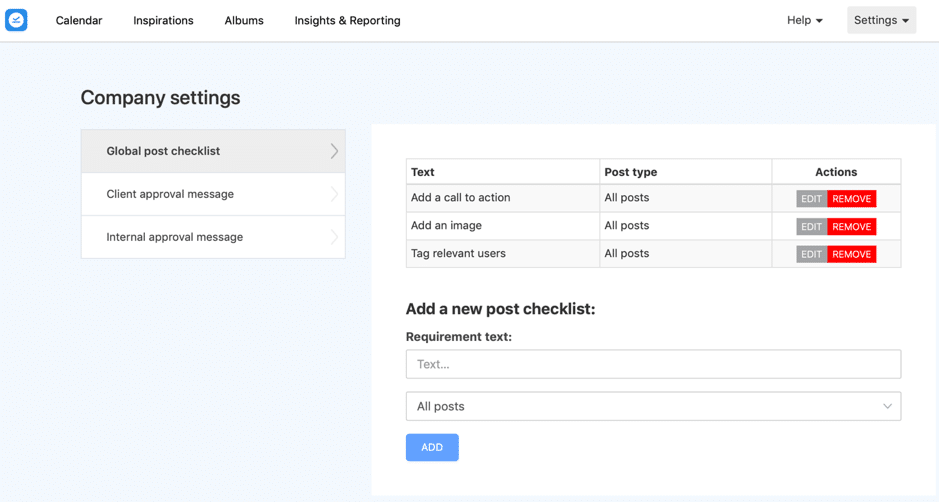
For example, on Facebook, you can add audience restrictions to control who sees your content (ages, locations, etc.). Plus, you can upload image templates to use with your posts, create post checklists for all kinds of different updates (GIFs, link posts, image posts, etc.), assign users to specific accounts and create custom, colour-coded labels for your updates:
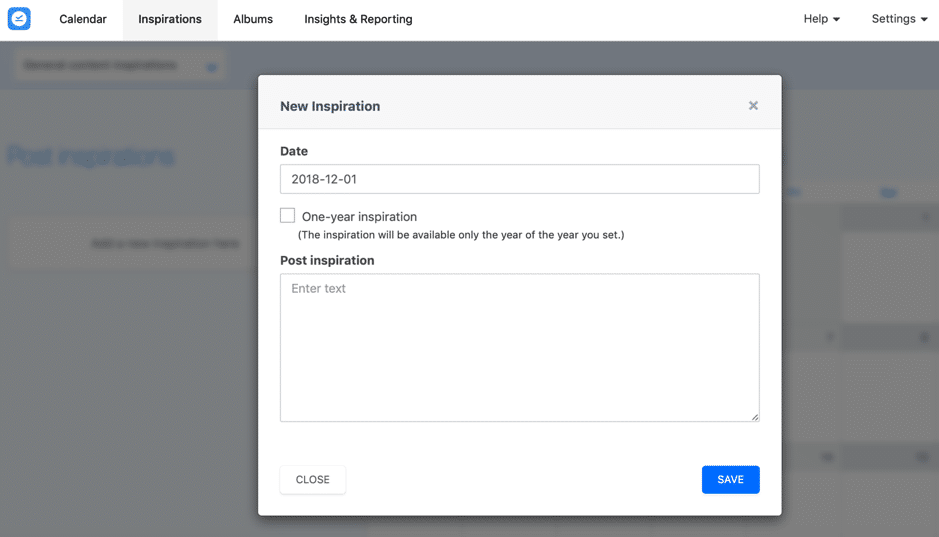
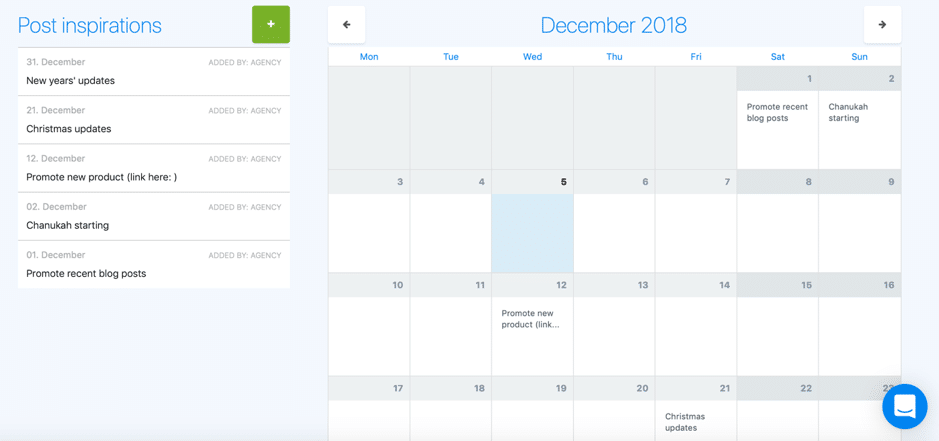
As I mentioned earlier, one of the first steps you need to take as part of a social media workflow is to provide ideas and direction for the type of content you need. In Kontentino, clients and managers can do so directly within the platform, in the Inspiration tab, where they can add new “inspirations” (i.e. what they want to promote, what type of content they’re looking for, what upcoming product launches they have, etc.):
The manager or client can provide direction for each day of the month if needed and the team will be able to see this post in list form, and in the actual Inspirations calendar:
Based on these ideas and proposals, the content creators can then start creating content and adding it to the platform for approval.
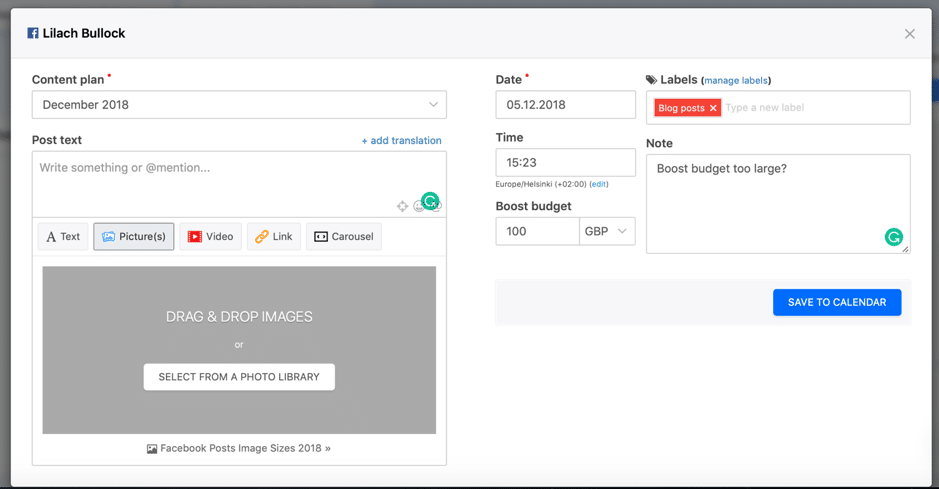
As for adding posts to the calendar, you have multiple useful options to help keep things very clear and organised:
Add the appropriate labels and content plan (i.e. what campaign it’s part of/month/etc.), add the date and time and of course, write your update and add any visual content. You can also mention people and tag them, add a translation, leave notes for other team members and on Facebook, you can even write down your boost budget.
You’ll have to actually pay for it manually directly on Facebook but this helps paint a clearer picture of where and what you’re spending.
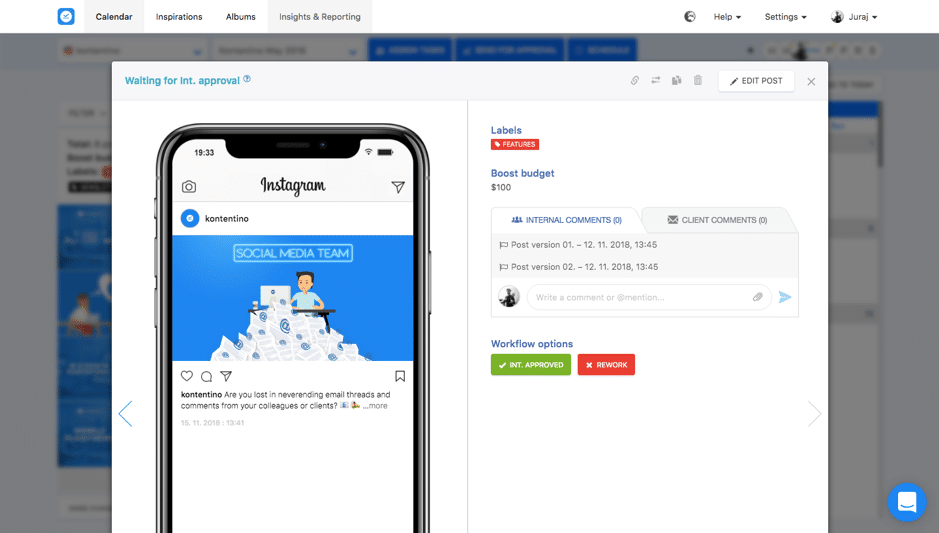
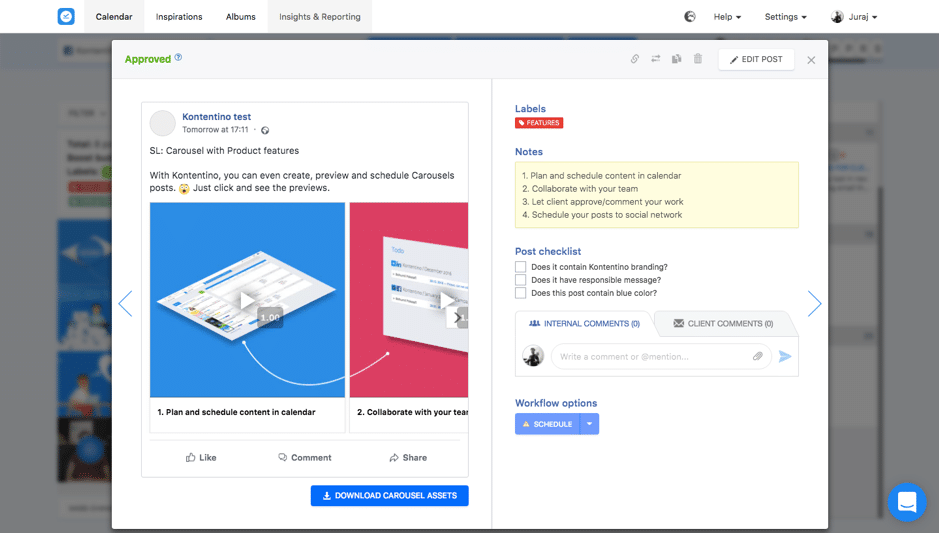
Once you’ve clicked on “save to calendar”, you’ll see a few more options (along with a preview of your post):
As you can see above, you can leave internal or client comments (clients are only able to see client comments and no internal comments), assign tasks to specific team members or send the update for approval internally or to the client (or, if you the power, you can also schedule it directly).
If you want to duplicate the post and publish it on your other channels as well, simply click on the “duplicate post” button and select the social media profiles you want to use.
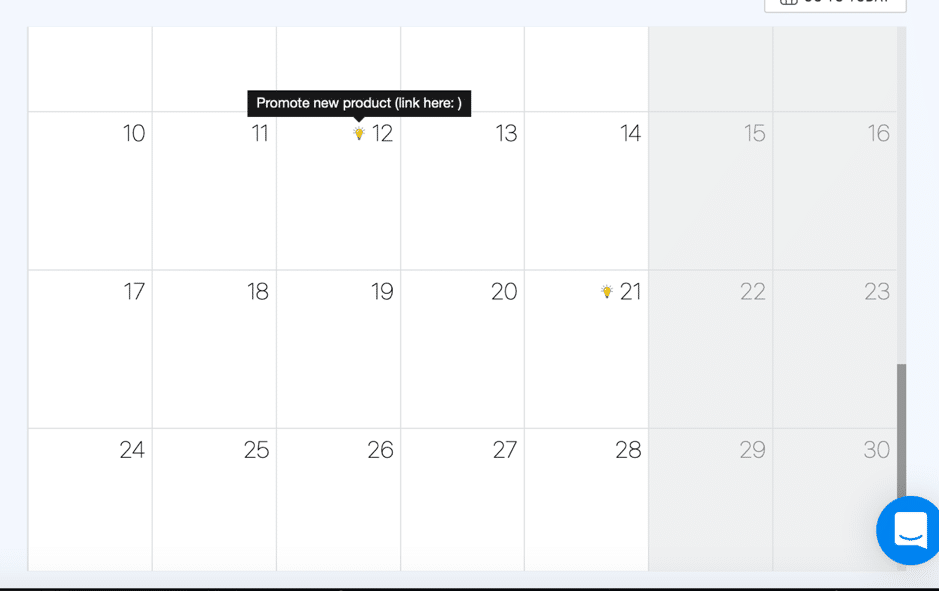
When a team member is in the main calendar, they’ll be able to see a small lightbulb on the days when a client added an “inspiration”; by hovering it, they can see the brief from the client and what type of content they need to create:
As you might remember from earlier, you can create checklists for each social network and all the different types of posts you can create for each one:
In this case, I’ve added 3 things that need to be done for all Facebook posts, no matter the content.
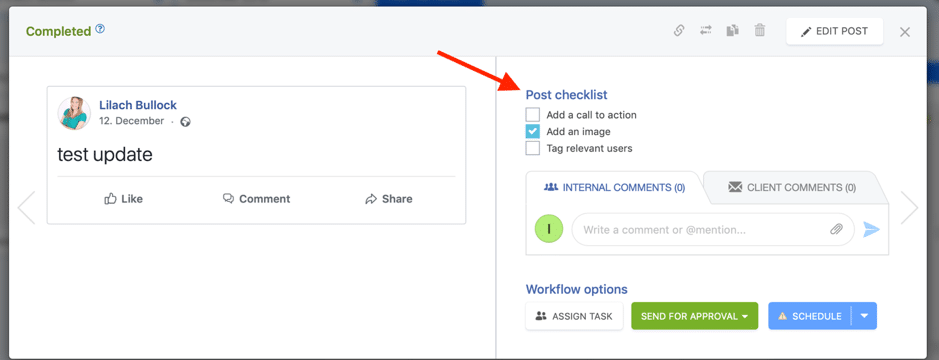
This way, if someone from the team adds a Facebook post to the calendar, they’ll see a checklist at the end that will help them make sure they did everything that needed to be done before scheduling a post or sending it for approval:
This is very useful even as a solo user; it can be difficult to make sure you’ve covered all of your bases, so including a checklist list can help you avoid any possible mistakes, upfront.
Albums and insights
While Kontentino’s main features are the social media calendar and the approval workflow options, you also get some other very useful management features:
- A place to store all of your visual content
- And social media insights about your content + reporting for clients
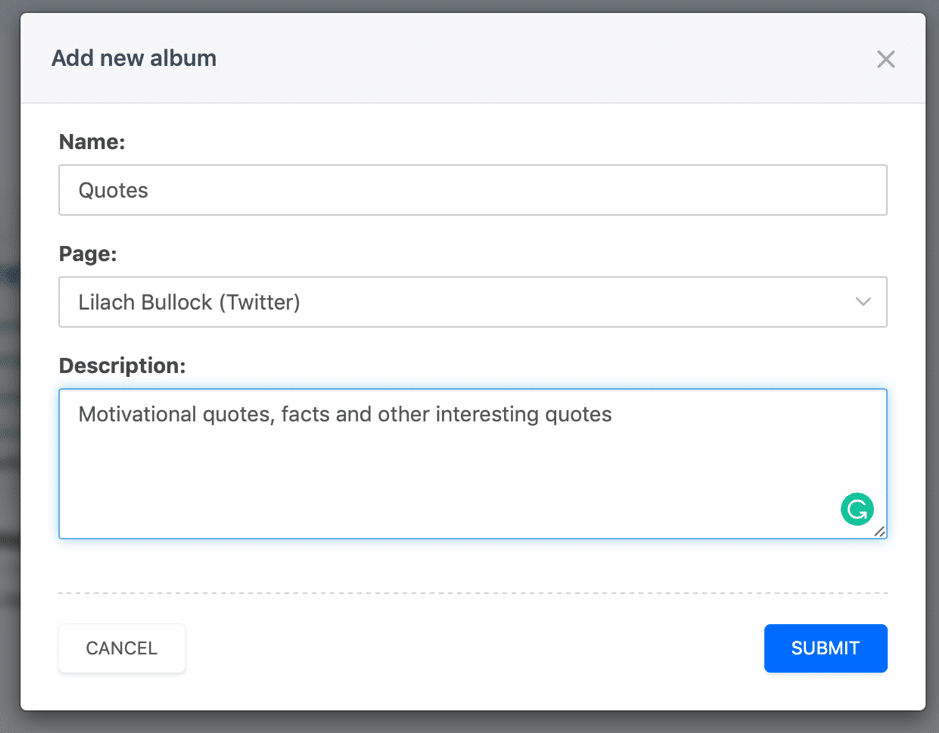
To store all of your content on Kontentino’s cloud (and easily get access to it when you need images or videos for your posts), go to the Albums tab. Here you can create albums for each of your social media profiles and pages, to keep things super organised:
My advice? Add all the visual content you have, here – it will be so much easier and quicker for everyone to find what they’re looking for (plus, add clear descriptions of the type of content to make it easier to filter through the library).
Plus, if you upload any images to an update (even if you don’t end up scheduling it), the tool will automatically add it to an album of uploaded post images so you won’t lose anything.
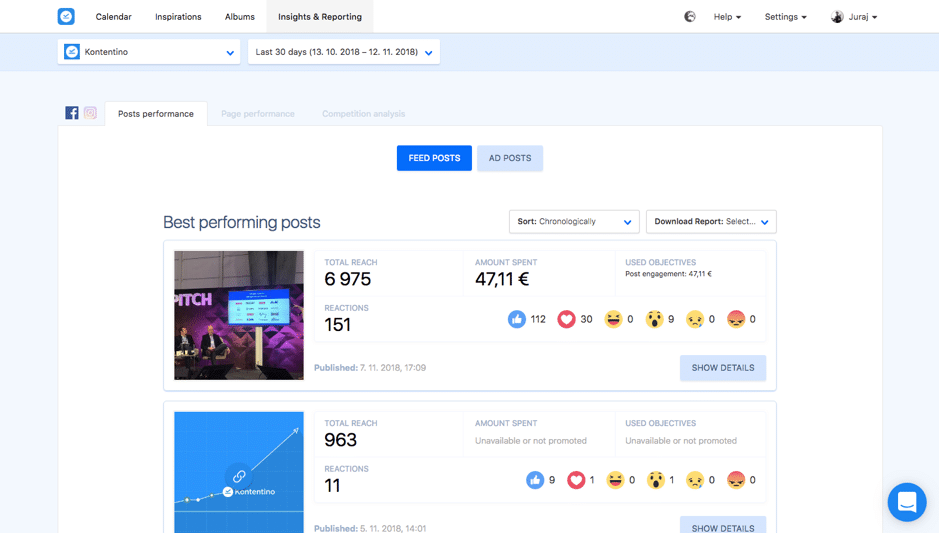
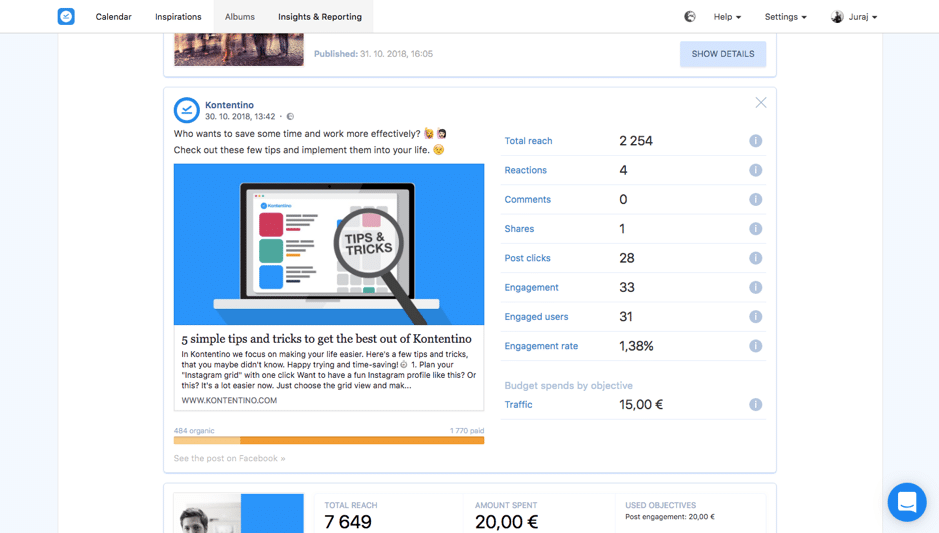
Beyond the assets library, you also have access to Facebook and Instagram insights:
- What your best performing posts are
- Overview of your page’s performance
- Analysis of your ads’ performance
- Compare the client’s Page metrics and performance with competitors – a new feature coming early 2019
Aside from that, you can also create PDF with reports for clients; just add the metrics you want to be included and build your own report.
Conclusion
When it comes to building powerful and high-performing social media approval workflows, Kontentino is one of the most powerful and intuitive platforms I’ve tried so far. Use it to not only plan and schedule your social media content but also to build a very clear, step-by-step workflow that ensures you never miss anything important and that you’re creating the best possible content for all your social media.

Follow Lilach


