Follow Lilach
How to sell your knowledge online with Kajabi
The internet offers us a plethora of possibilities – we just have to reach out and grab them. And one of these possibilities is that now, anyone can sell their knowledge online, whatever that knowledge may be. But, how exactly do you monetize your knowledge? In this blog post, I’m going to show you how to sell your knowledge online with Kajabi.
How to sell your knowledge online with Kajabi
What is Kajabi?
Kajabi is a knowledge commerce platform; in other words, it’s a tool that allows you to monetize your knowledge by helping you build online courses, coaching programs, membership websites, and monetize them.
Without using an all-in-one service that walks you through the process, this type of endeavour can be daunting. But this platform not only helps you create, host, and sell your products, but it also allows you to market them with Pipelines (a very cool feature that you can read about in detail in this review), email marketing (including email sequences), upselling offers, and with all kinds of automations.
Here’s what you can do with Kajabi in more detail, as well as see how easy it is to use it to monetize your knowledge.
Getting started with Kajabi
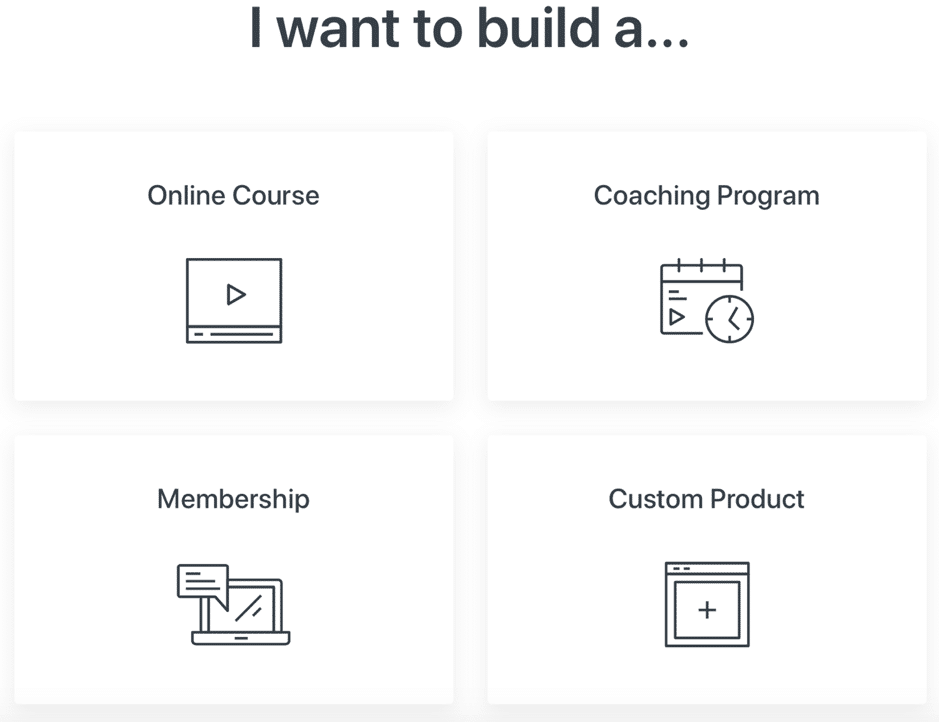
When you get started with Kajabi, you have the option to create several products: an online course, a coaching program (that drips out content over a period of time), a membership program, or you can choose to build your own custom product by yourself:
I’m going to choose the coaching program.
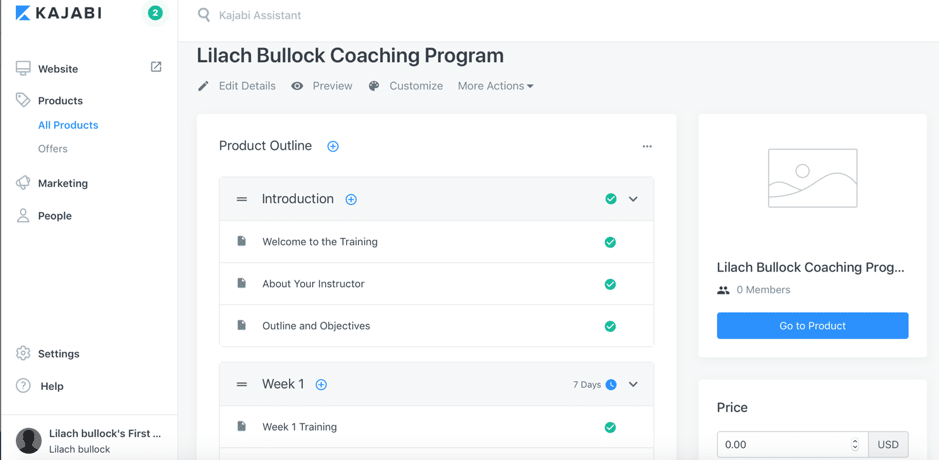
In seconds, the tool generates the “product” you want so that you can start building it out to your liking:
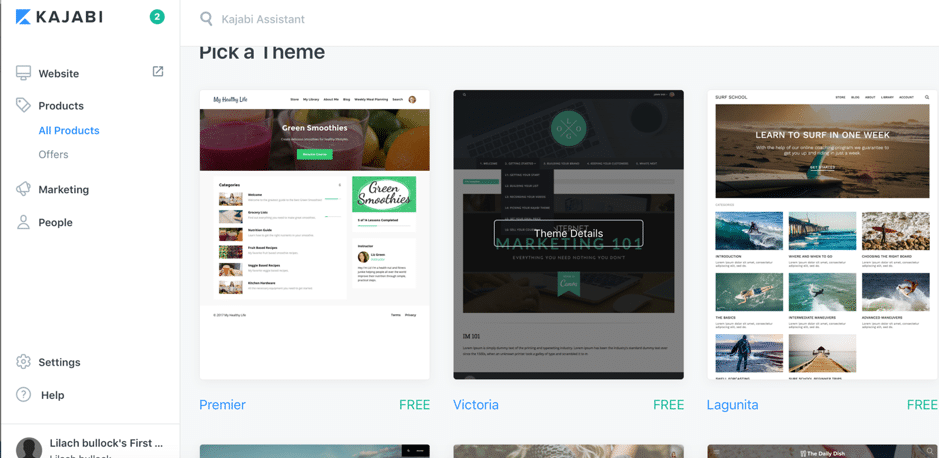
The first thing I want to do here is to pick the right theme for my coaching program – something that fits my branding and the topics I’ll cover, and of course, something that looks great:
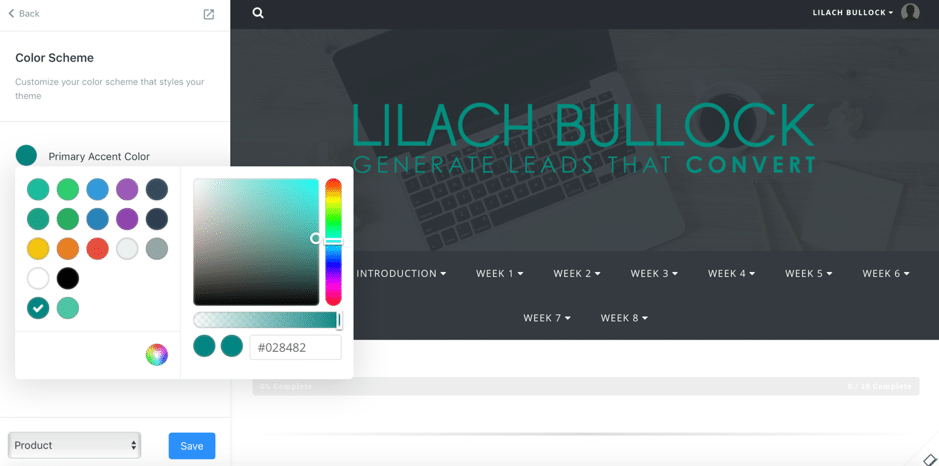
Once installed, I can further customize the theme with my own colours and branding in order to make sure it looks exactly right:
You can set up all the settings you need from the menu on the left-hand side of your builder dashboard: add social links, change background images, change the navigation menu, and so on – it’s very easy, all you have to do is follow the instructions in the menu.
The real work, though, is when planning your actual product. In this case, we’re talking about a coaching program. That’s not to say it’s difficult to do – quite the contrary, in fact – but more so regarding all of the content you need to create.
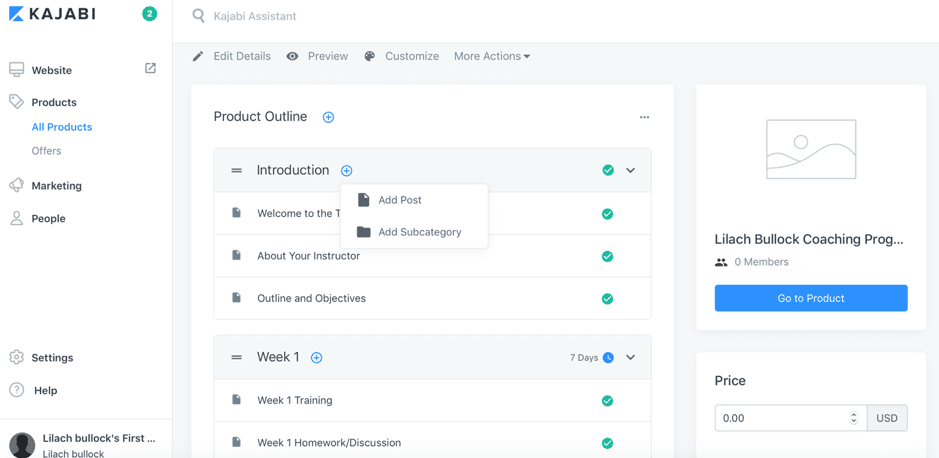
On your product page, you’ll see a complete outline of your product. My coaching program features an introduction, followed by eight weeks of training, with each module including custom content.
Each element of my product has a built-in set of categories which I can easily remove, change, or customize by adding my original content. Or, I can add new posts or subcategories as needed:
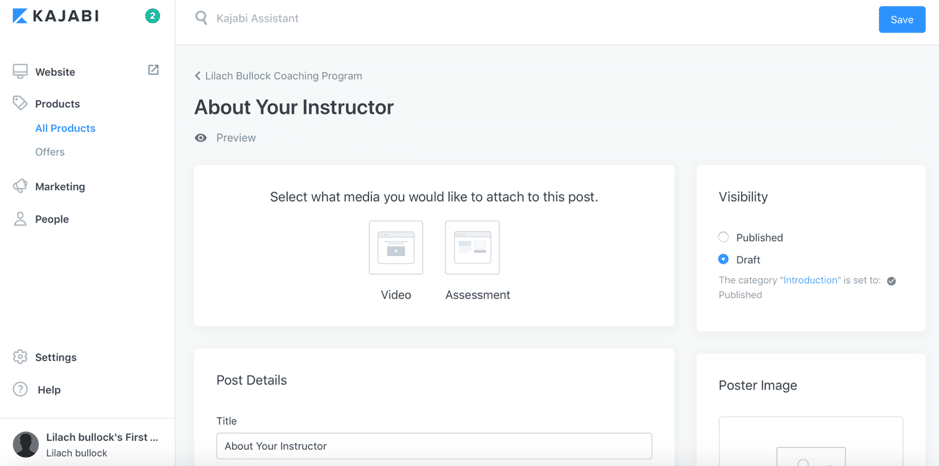
Once you’ve customized the outline of your product, you can start editing each part and adding your content, by clicking on the desired post:
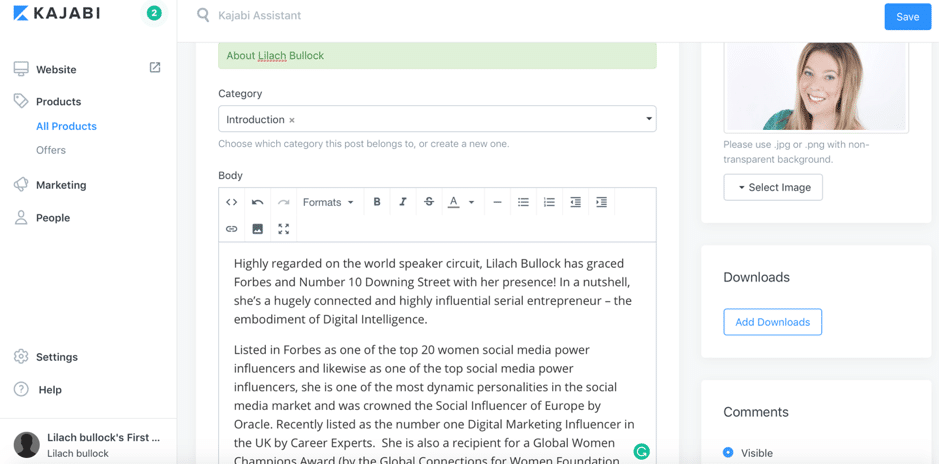
Here, I can choose to upload either a video or assessment, I can add an image and any relevant downloads, I can choose whether to allow comments or not, and I can customize the text on the page – in this case, letting future attendees know who the instructor is:
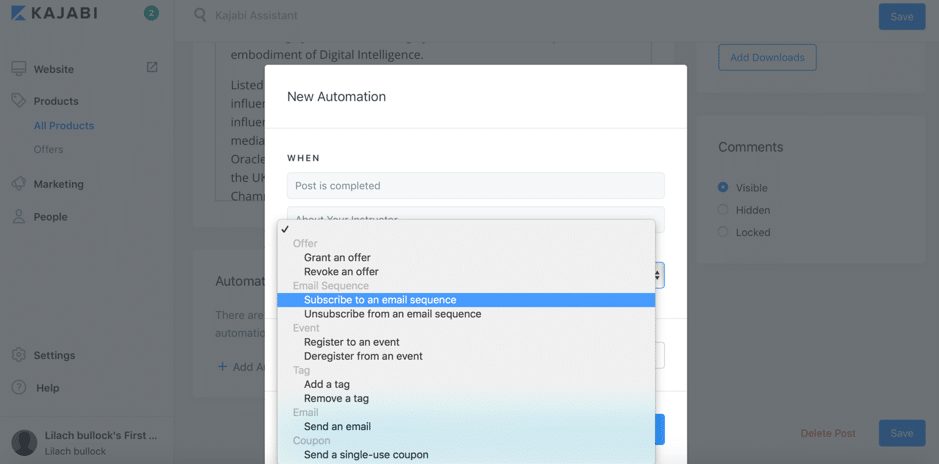
Plus – and this is a really cool feature – I can set up automations for each stage of my course. When the post is completed (which is the trigger), I can choose what action I want to take place, such as granting the attendee a specific offer, subscribing them to a specific email sequence (we’ll talk about all the automation features in a bit), tagging them, and so on:
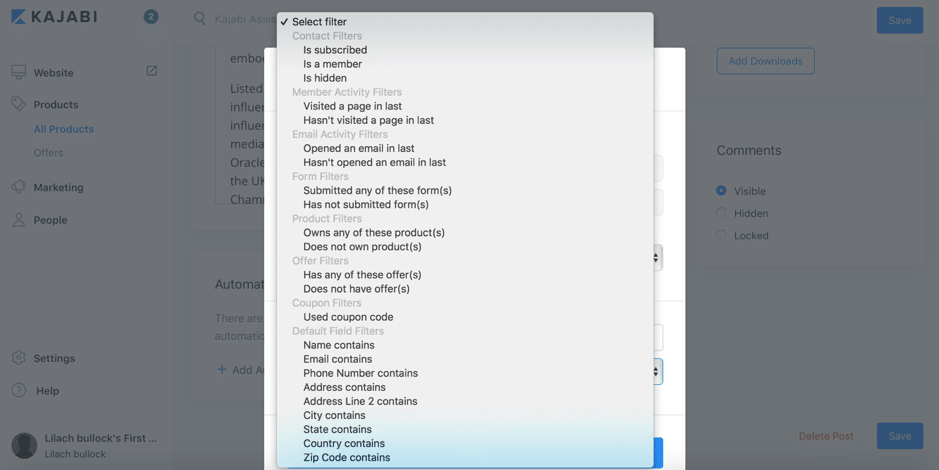
Plus, in order to be as accurate as possible and deliver truly personalized experiences to help you convert more, you can add more conditions to your automation, as you can see below:
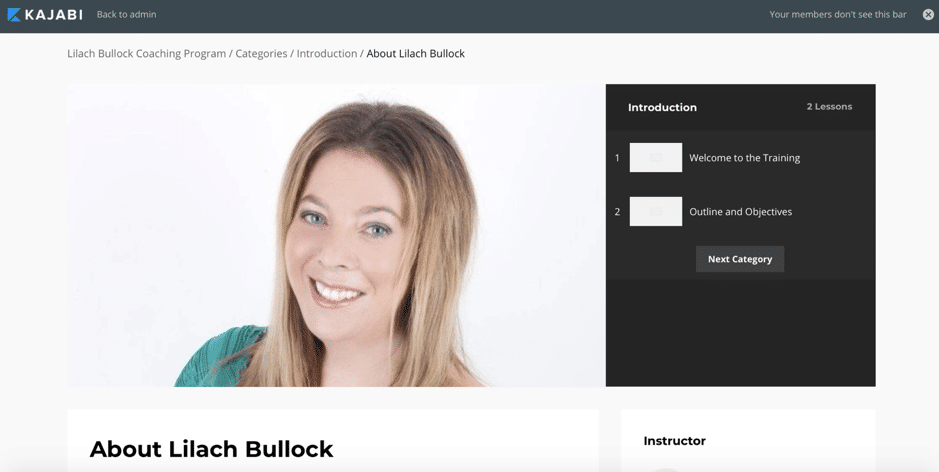
And that’s pretty much how you customize each page and category of your product. It’s easy to do, as the platform is very intuitive and keeps things simple. And once you’re done, don’t forget to preview your pages as well, to see what they will look like for attendees:
Now that you’ve created your product, the next step is to set up its pricing so that you can monetize your work and knowledge.
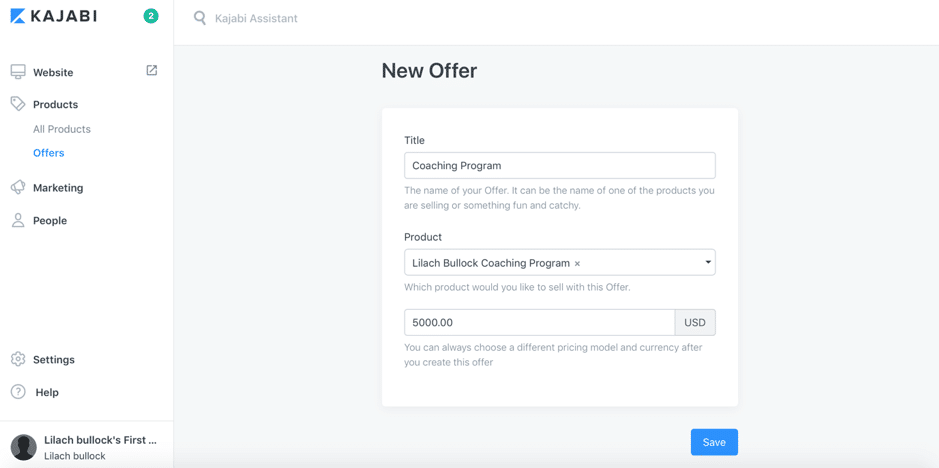
You can do this by heading over to Offers and choosing the right product from the drop-down menu:
Obviously, a set price is not your only option; once you save your initial offer, you can further customize the pricing and payment models to suit your needs.
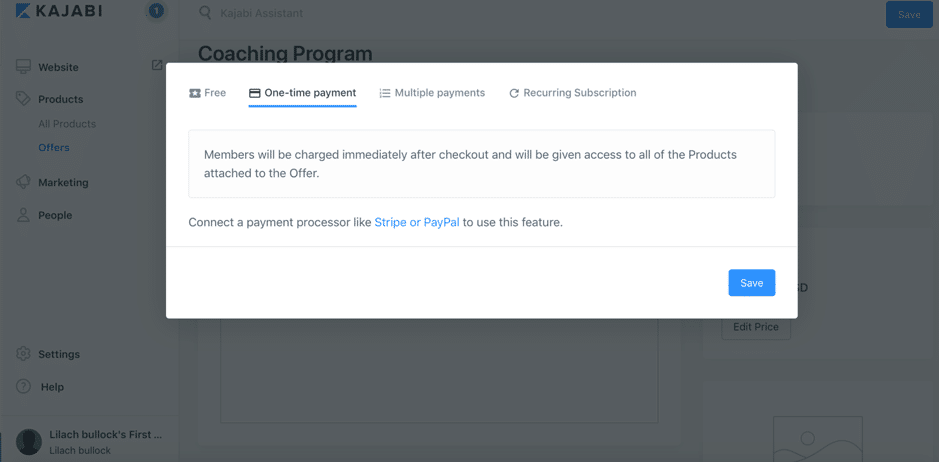
For example, click on Edit Price to choose the payment type:
You can offer your product for free, or you can give your potential customers a few different options: pay it all in one go in order to attend the course/program/etc., allow attendees to pay the full price in multiple monthly instalments until they pay the full value, or create a recurring subscription so that clients need to pay a fee regularly to attend.
As for what payment processors work, you might’ve noticed in the above screenshot that both PayPal and Stripe can be connected.
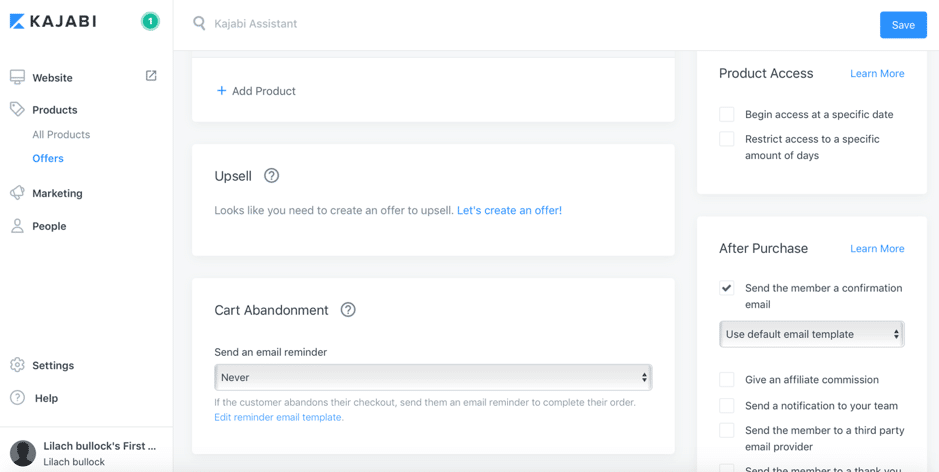
Kajabi offers numerous other useful options for your checkout. For example, you can choose to include several products for the same payment, as well as create more offers for upselling:
Additionally, you can set up all kinds of useful automations, such as:
- Send an email reminder for those who abandon their carts
- Send them an email immediately after purchasing your offer, or add them to an email sequence
- Tag them or remove a tag, which is useful for audience segmentation over time
- Send them a single-use coupon
You also have a few options for “after the purchase,” as you can see in the right-hand corner of the above screenshot: give an affiliate commission, send a notification to your team, and so on.
There are numerous other customization options, though – so much so that it would be a real struggle to get through them all. Suffice it to say, you can customize your offer completely to your liking, create all kinds of automations, and ensure any legalities are handled (service agreements, copyright, and so on).
Now, I want to tell you more about Pipelines and how you can also use Kajabi to market your product and get it to your audience.
How to use Pipelines, email campaigns, and other marketing strategies to promote your product
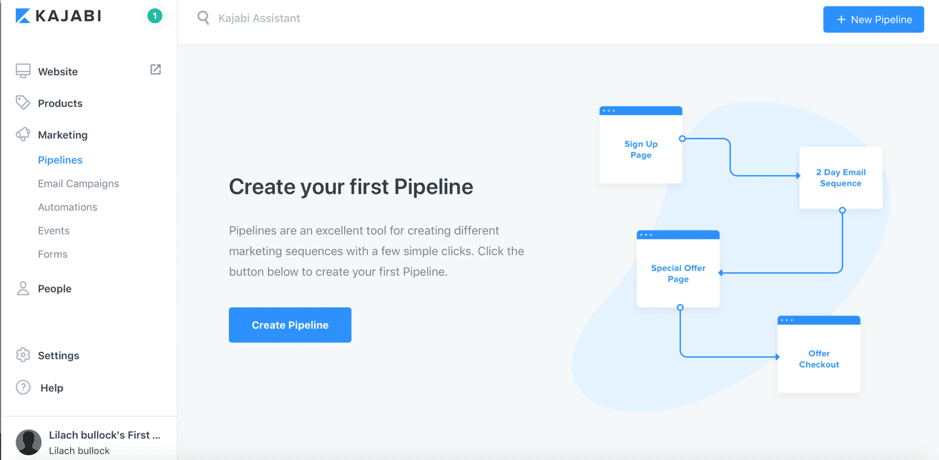
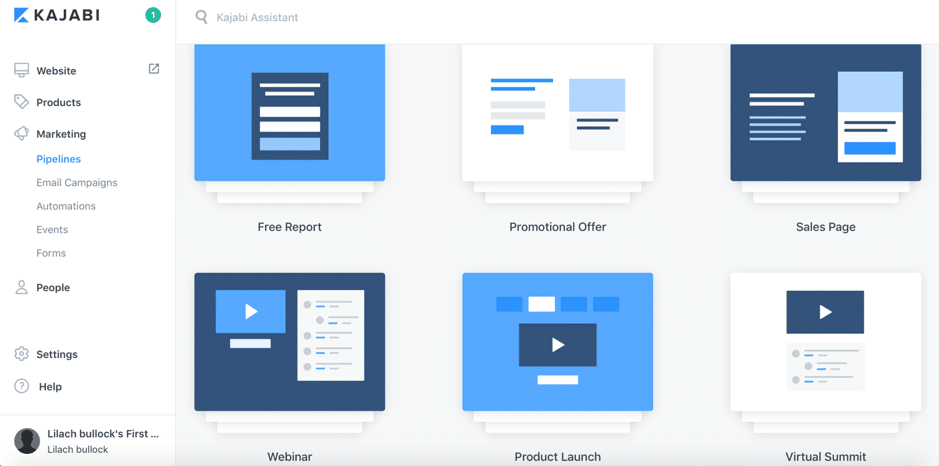
Once you’ve created your product, you can promote it directly within Kajabi and set up powerful marketing processes with so-called Pipelines, so that you can run your marketing campaigns easily and effectively from within the platform. There are a few different Pipeline templates already set up, or you can start your own from scratch:
Here’s some of what you can do with Pipelines:
- Use the Free Report Pipeline to offer a downloadable report and capture emails, and make sure to send users a thank you email to help promote other offers too
- Create a Promotional Offer Pipeline to capture emails with a download and send them to a low ticket offer sales page, as well as send the user an email
- Create a Product Launch Pipeline to capture emails and send users a series of targeted content assets (such as multiple videos) in order to build anticipation for your upcoming product launches and get your most loyal customers to opt in for pre-purchase offers
As I mentioned before, you can also build your own Pipeline from scratch – and beyond that, you can customize each Pipeline template to suit your needs.
Create email campaigns to promote your product
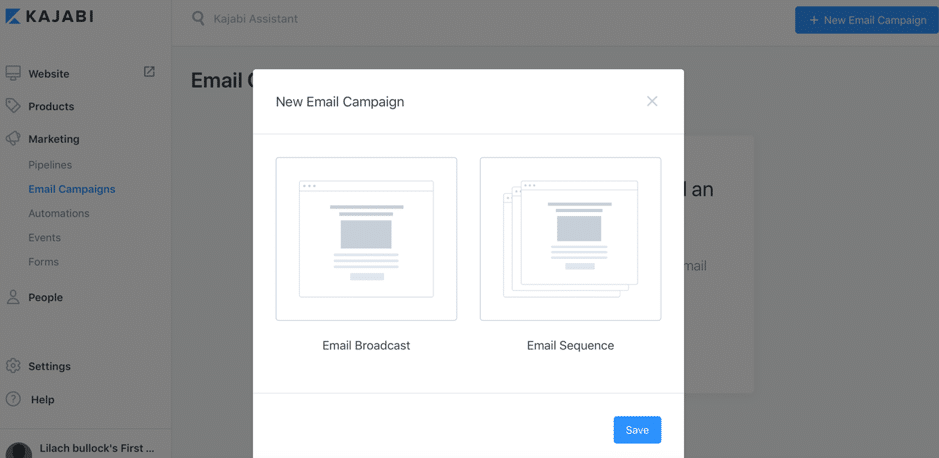
Another way to market your product with Kajabi is with email marketing; you can send an email broadcast or create an entire email sequence:
Let’s choose an email sequence for now, as it’s a bit more complex than a simple broadcast. Once you’ve given it a name, you can start building your sequence, starting with the first email:
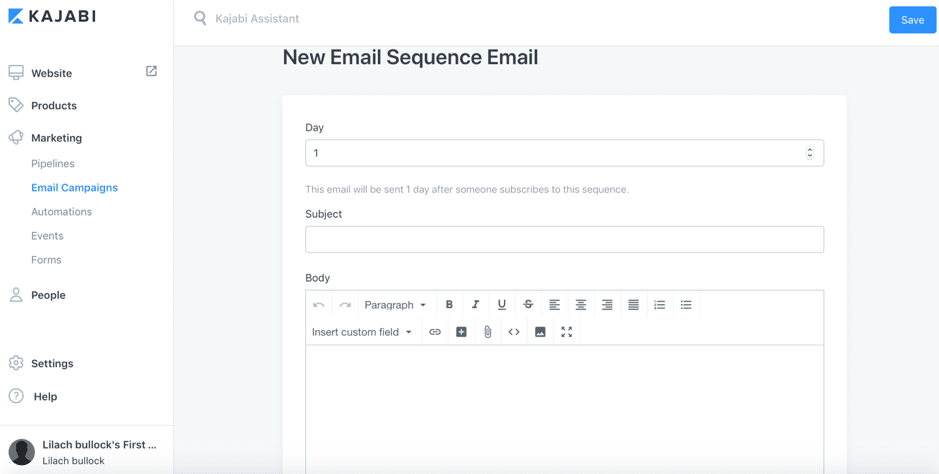
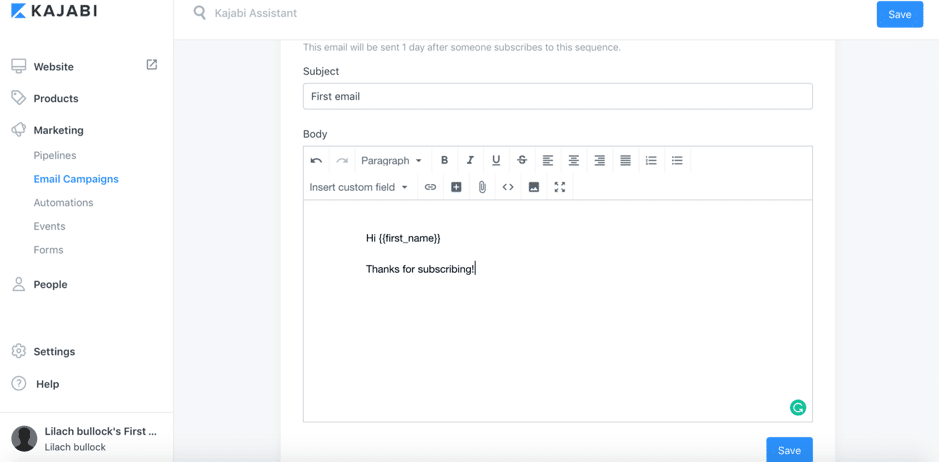
All you have to do is choose when to send the email (in this case, one day after being subscribed to the sequence), give it a subject line, and write the body of the email.
Then, simply upload images and files, insert custom fields to be automatically added to your email, like name/last name, country, address, phone number, and so on, and customize the email with headings:
Other useful marketing features
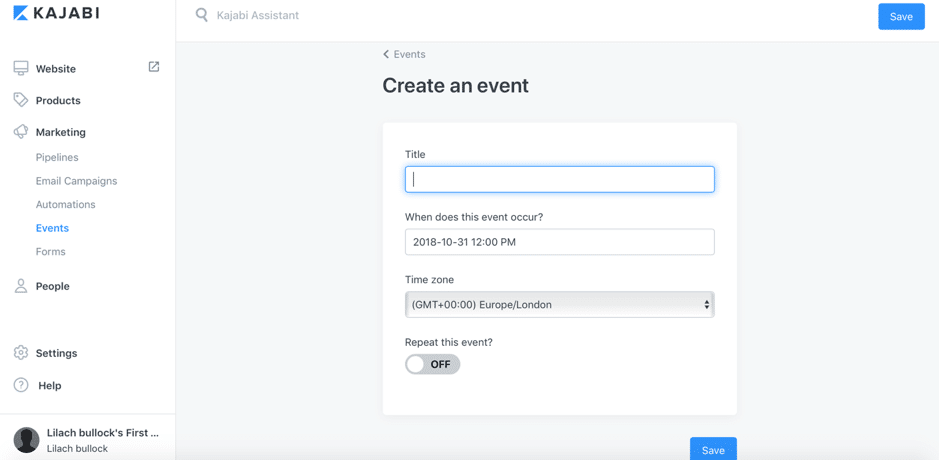
Beyond Pipelines and email campaigns, there are a few more things you can do to help promote your products and offers. For example, create events to engage your audience:
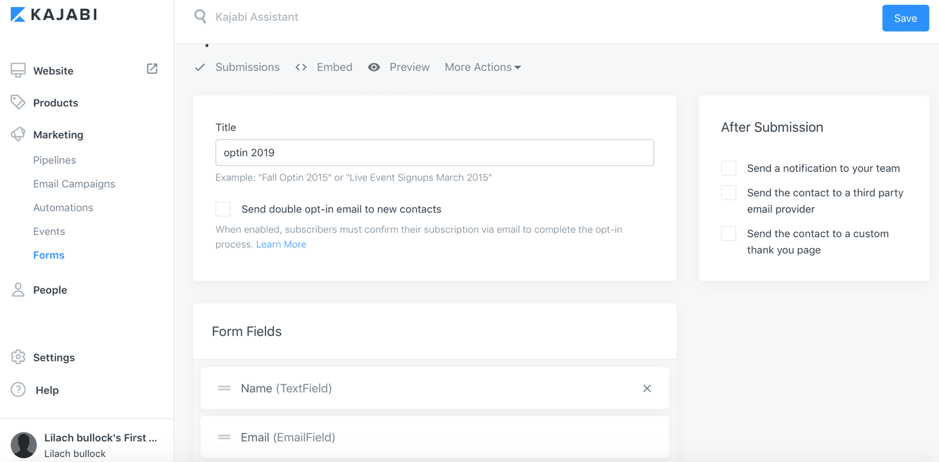
Or, you can create forms – just add the fields you want to add and set up any relevant automations:
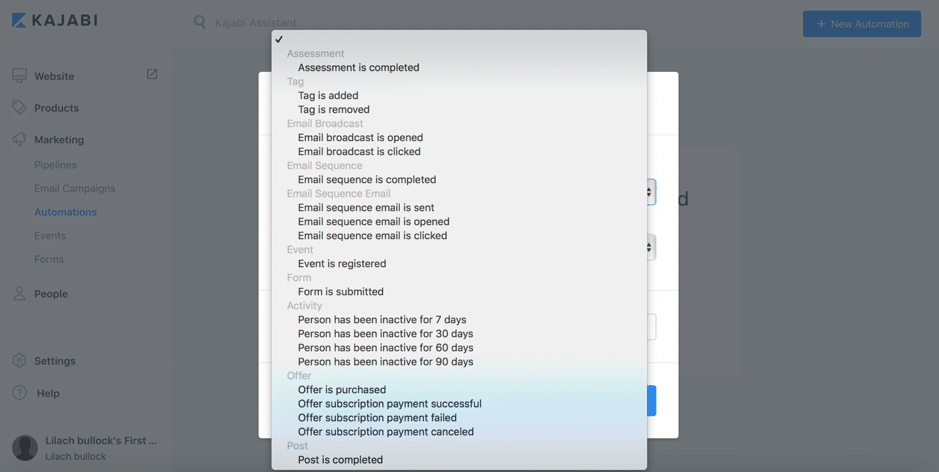
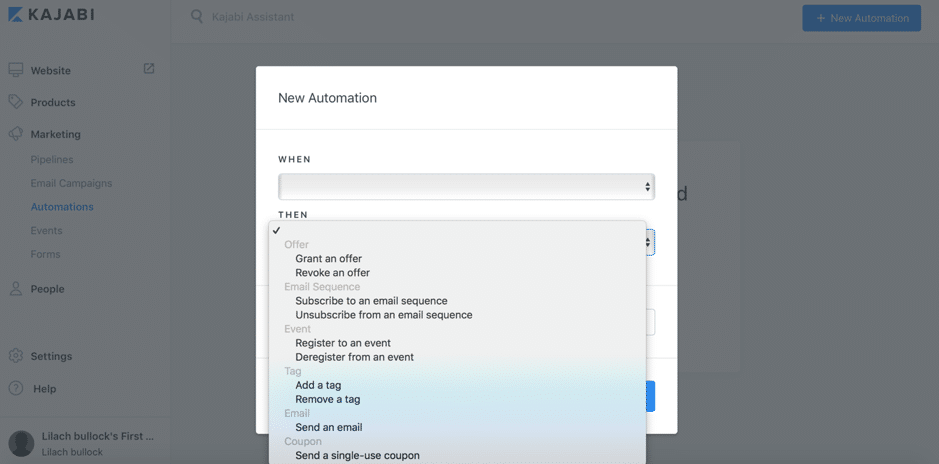
And last but not least, you can set up all kinds of automations to help you promote your product:
In the previous screenshot, you can see all the trigger options (when someone does this…); following, you can see the actions that can be taken when the trigger is activated:
Conclusion
Kajabi is an extremely powerful tool that can help you monetize your knowledge – not just by helping you turn your knowledge into a product that you can sell, but by actually helping you every step of the way.
This includes marketing your product and using upselling tactics and managing your members and products, all in one place.
Have you tried monetizing your knowledge yet?

Follow Lilach


