

Follow Lilach
The easiest way to convert your website visitors into customers
I’ve said it before and I’ll say it again: getting lots of traffic to your website is great, but if that traffic is leaving your website without taking any action, then it doesn’t really make a real difference to your bottom line. As a business, you need people to not just visit your website, but also sign up for your email list, follow you on social media, buy from you and so on. In other words, you need them to take action before leaving your website – but how do you achieve that? In this blog post, I’m going to show you the easiest way to convert your website visitors into paying customers.
The basics of conversion rate optimization: converting your website visitors into customers
Converting your website visitors into customers should not rely on hope; in fact, it’s very much an art and a science.
Because if you want to convert as many of your visitors as possible, then you need to optimise your website for conversions.
Conversion rate optimization – or CRO for short – is the process in which you’re increasing the rate that your website visitors are converting.
A conversion can be anything from simply viewing a specific page of content to, of course, buying something from you. So before you can start optimizing your website for conversions, you first need to establish what conversions you want your website visitors to make; for example:
- Signing up for your newsletter
- Completing a form
- Seeing a particular page or certain content from your website
- Downloading your app
- Getting people to give you a call or schedule one
- Getting people to follow you on social media and engage with you
- And of course, whenever you make a sale (for example, by promoting a special offer in the right space)
Once you know what you want people to do while on your website, you need to find the best ways to optimise your website so that you can “push’ visitors into taking these actions.
For example, a well-timed exit intent pop-up can help you boost conversions significantly; for example, Hello Bar use this exit intent pop-up on their website:
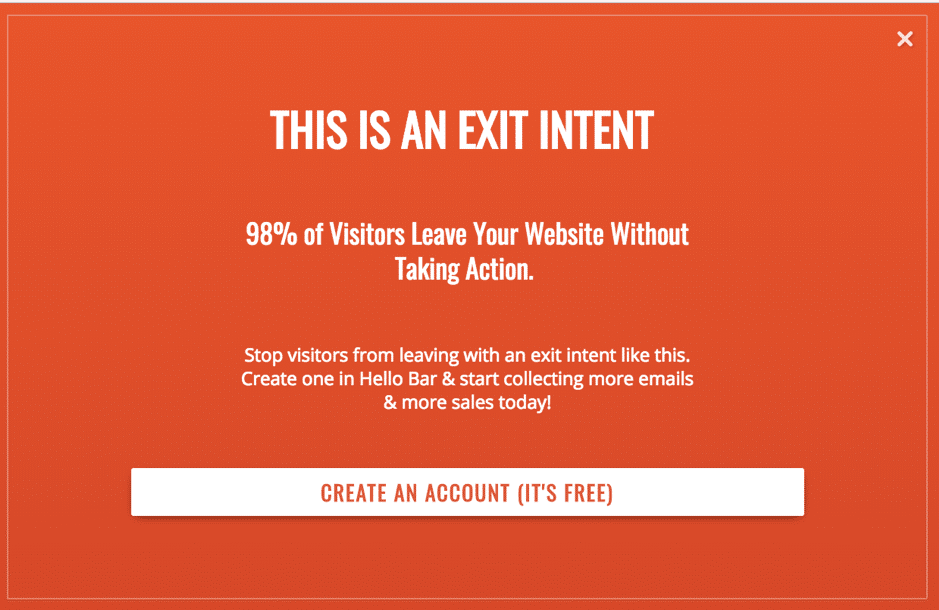
This simple technique gets them 900 extra sign-ups per month – and all it required was to quickly set up the pop-up.
So while most conversion rate optimization techniques are usually lengthy processes that require a lot of testing and trial and error, there is a quick way to boost your conversions immediately…
What is Hello Bar and how does it help convert your website visitors into customers?
And that quick, efficient way is a simple notification bar placed at the top of your website simply called the Hello Bar (although there are other types of forms that you can create as well, which I’ll tell you all about in a bit!):
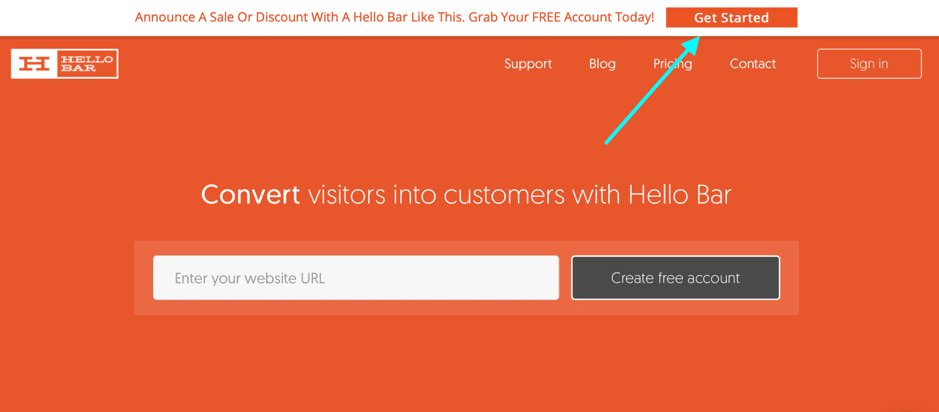
As you can see in the screenshot above, it’s a simple, unobtrusive notification bar that sits at the top of your web pages; it’s highly visible to anyone visiting on your website and you can use it to spread any message you want:
- A sale announcement or a discount
- An awesome email newsletter to sign up for
- The amazing content you’ve just written and you want people to see
- The useful resources you’ve created for download
And pretty much anything else you can think of to promote or simply say to your website visitors.
The really cool thing about Hello Bar though is that the notification doesn’t disappear as the visitor scrolls down the webpage; rather, whenever someone scrolls through your web pages, the Hello Bar will remain at the top of their window so that they keep seeing the message while browsing your website and therefore increasing the chances of making a conversion.
Here’s how it works:
How to get started with Hello Bar
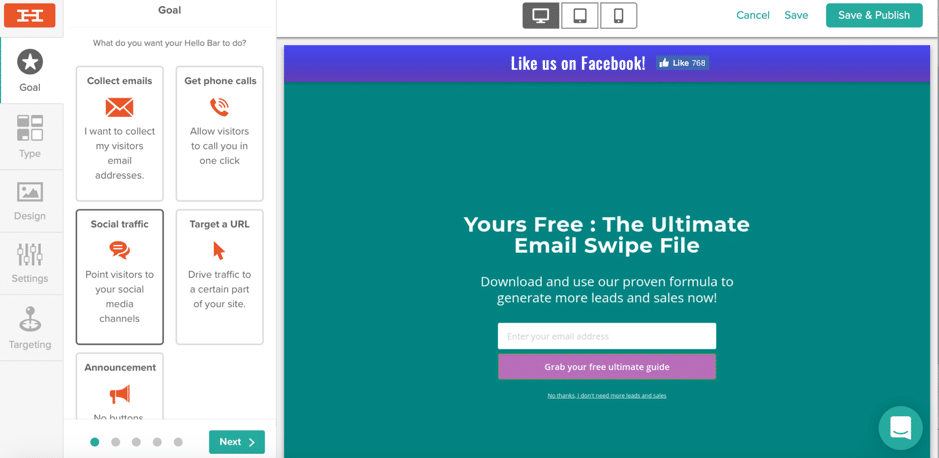
The first thing you need to do when after creating your Hello Bar account is to choose your goal – what do you want to achieve with the help of your assets?

As you can see in the above screenshot, you have several options as campaign goals:
- To collect your visitor’s email addresses
- To drive traffic to a certain part of your visitors
- To promote a sale, discount or promotion and get people to buy from you
- To make an announcement (about your business, products, services, etc.)
- To get people to call you
- To get visitors to check out your social media channels and start engaging with you
Of course, you’ll be able to change the notification bar/popup/etc. as needed, to suit your current business, marketing and sales goals.
Once you’ve selected your preferred goal (I chose the “target URL” in this case), you’ll see that you have multiple options to choose from, not just a Hello Bar:
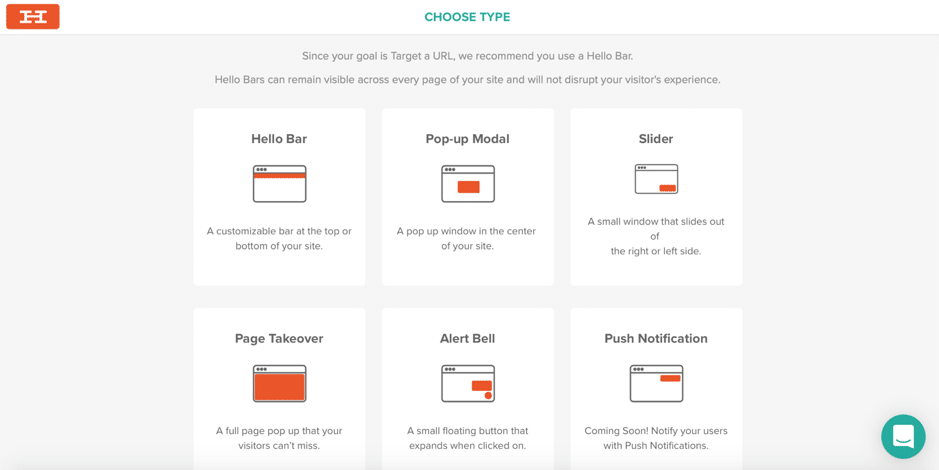
For each type of goal, the tool tells you which type of notification would work best; for example, for Target URL the tool recommends using the basic Hello Bar, while for the “Grow email list” goal, the tool recommends a Page Takeover.
But, what exactly does each option mean (except, of course, for the Hello Bar which we’ve already talked about)? Here’s a rundown of the available options:
- A Pop-up modal, a pop-up that appears in the centre of your website
- A slider is a small window that will slide out of either of the bottom corners of your page
- A page takeover is a full page pop up
- An alert bell is a small floating button that will expand if a visitor clicks on it
- A push notification is an on-the-spot notification
Once you’ve chosen what your goal is, as well as the form/pop-up you prefer, you’ll be taken to the builder where you can customize it to your liking (and, of course, branding):
As you can see above, the menu is on the left-hand side of the builder and it’s very straightforward. There are a few menu options, starting with Goals, where you can actually change the ultimate goal if you’ve changed your mind:
Even more so, you can also change the form type – no need to go back and start a new design from scratch, but rather experiment with the different options on the spot.
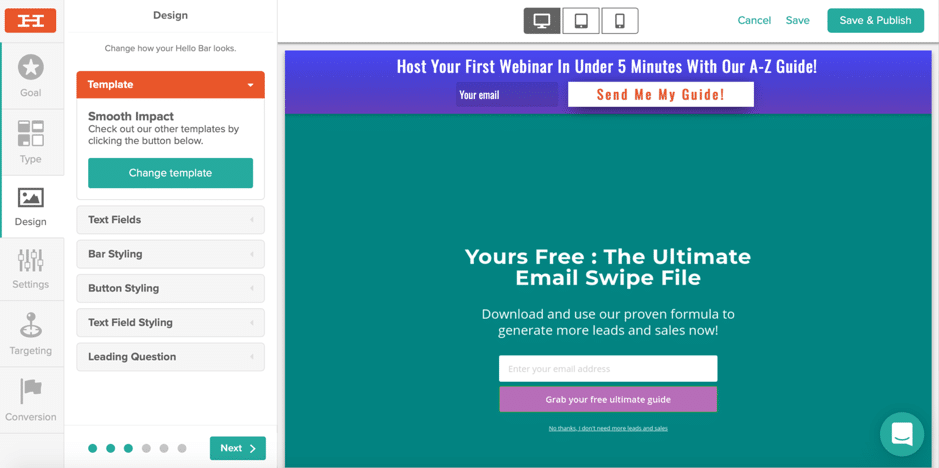
Designing your Hello Bar
Now, it’s time to customize and design your notification bar (or pop-up, slider, etc.). This process is super easy and takes minutes; to start with, choose the template you prefer:
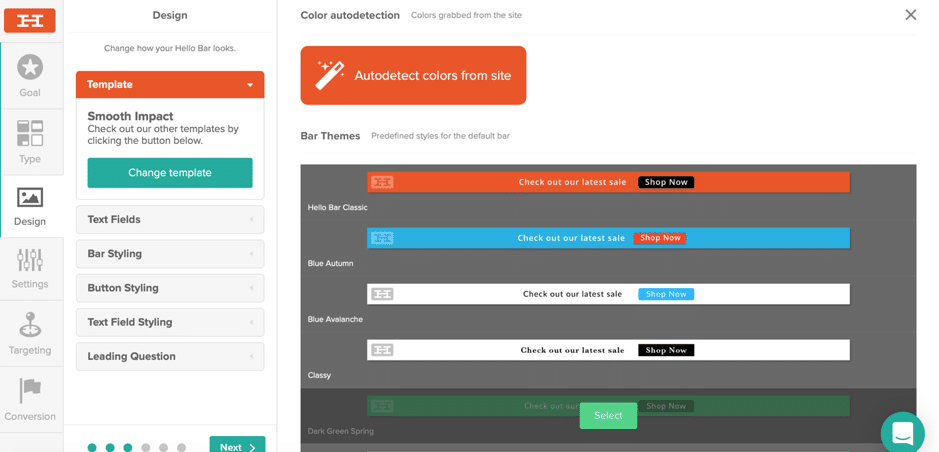
There are numerous great options, but if you prefer to use your own brand colours (and save time), you can click on “auto detect colors from site” and the tool will automatically change the bar with your colours in less than a couple of seconds:
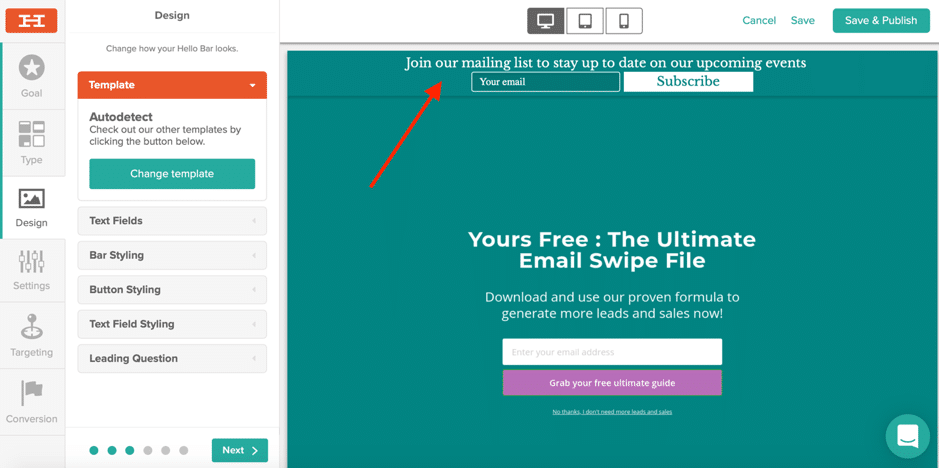
Next, you can also customize the form fields in your bar; depending on which notification type you’re using, you’ll have different options – for example, with a “Grow Email List” Hello Bar, you can add up to 2 fields (email and name).
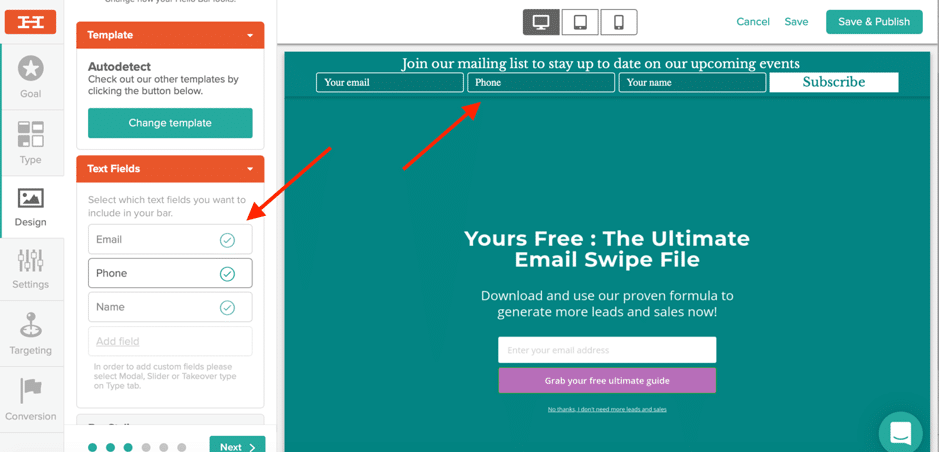
You can also further customize the colour of your bar, as well as change the default text colour and size; plus, if you’d rather your bar was at the bottom of people’s screen, you can simply change the placement with a couple of clicks.
The call to action button, however, doesn’t really stand out; so I’m going to change the colour and size of the call to action button:
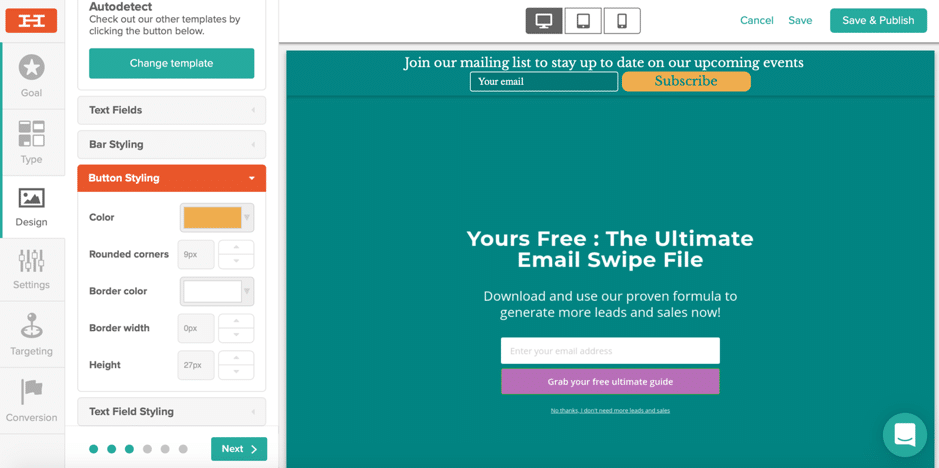
And finally, I can also change the “text field styling” (where it says “your email”) and add rounded corners, change the background and text colours, try a different font and so on.
With those final decisions, the design is ready.
And now, I’m given another option: do I want to engage my visitors for a bit first? Ask them a leading question before I take them to the form? Or, I can even ask them a few different questions – this could help improve my conversions as only those who are truly interested will take the time to engage.
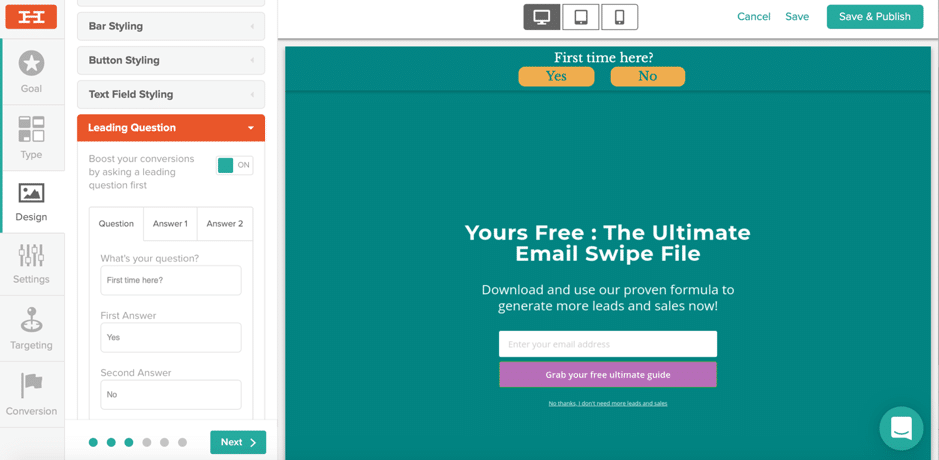
The tool automatically proposes a simple question you can use to engage your visitors: “first time here?”
If the visitor says Yes, then they will see a welcome message: “Welcome! Let’s get started…” and a different call to action button (“take the tour”). If the visitor says No, they will see the following message: “Welcome back! Check out our new sale” and, as before, a different call to action button – “shop now”.
For example, Neil Patel used a simple Yes or No question on his website, which boosted his email collection by an impressive 50.3%:
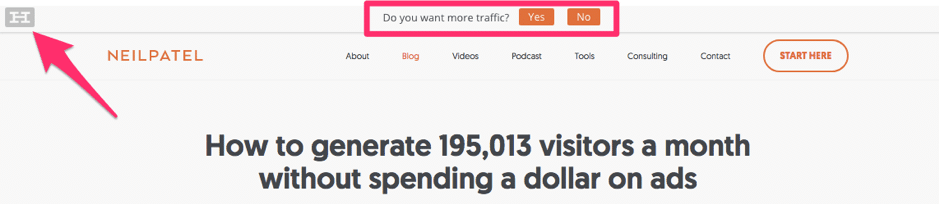
Of course, you can change the question and the answers to exactly what you want, but I wanted to share this example so that you can see how you can leverage this feature. That said, if you’d rather just promote your message and that’s it, you certainly have this option as well (just don’t select Leading Question).
Before you take your Hello Bar live though, you’ve got a few more options to go through, such as the basic settings:
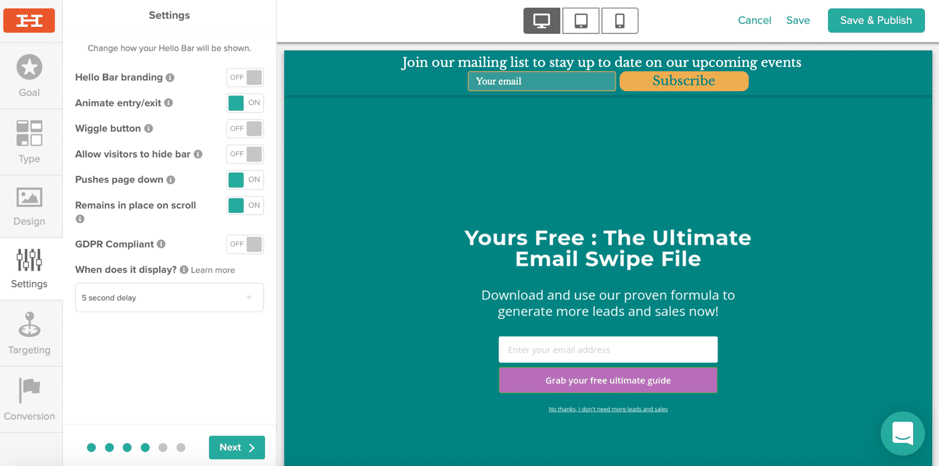
There are several options here, such as:
- Make it so your call to action button wiggles slightly so that it catches more people’s attention
- Allowing visitors to close the bar if they so prefer
- Make sure your bar is GDPR compliant, meaning anyone who converts will have to go through a secondary opt-in to make sure you know their preferences
- Choose when to start displaying your bar, such as immediately (or all the time), after a certain period of time (5 seconds, 10 seconds, 30 or 60), after scrolling a little (or to the middle or bottom of your page), or as the user begins to leave your website (also called exit intent)
You can also control who exactly sees your notification; you can choose to make it visible to everyone and select when a user can see it again after converting (so if someone saw a Hello Bar promoting a discount and bought from you, you could hide that notification from them for a week if they come back to your website).
Plus, you can create all kinds of custom targeting rules to make sure the right people see the right notifications and therefore help improve your website’s conversion rate:
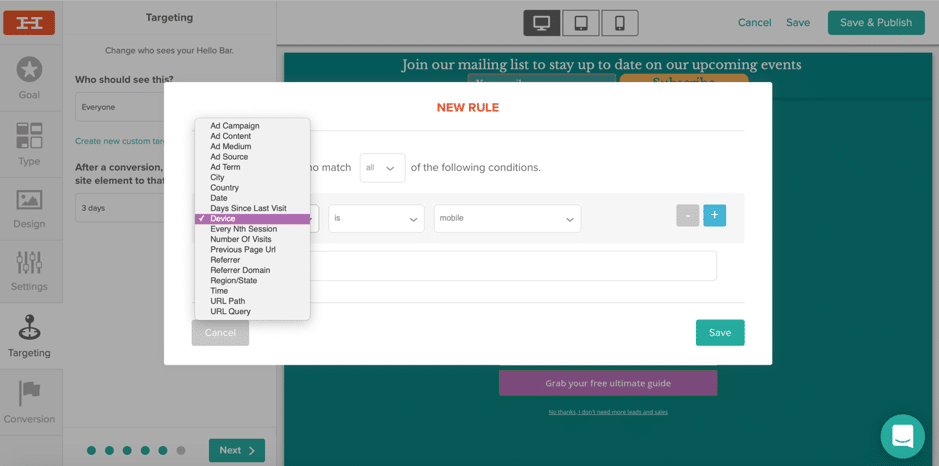
For example, one of the ways that you can use these targeting rules is to promote local offers to the right people. If you had a sale in a certain region, you could make sure that only people visiting from that part of the world can see your notification. Or, if you’re getting lots of email sign-ups from countries that aren’t relevant to your business, you could make it so the bar is only visible from the countries you are targeting.
Another option is to target a specific referrer – so basically only traffic coming from a certain source will see your message – or target a specific URL from your website (so that only when you’re on that page you can see the notification/offer/etc.)
That said, there are numerous options and it’s worth exploring them to see which ones suit your needs; because the better you target these notifications, the more users you’ll ultimately convert.
And finally, the last step of setting up your bar is to establish what happens after someone converts:
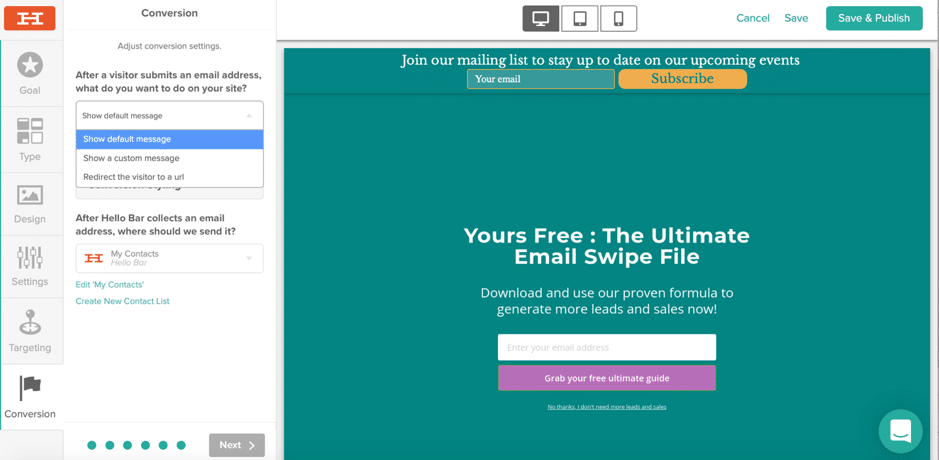
You can show them a custom message or you can redirect the converted visitors to a specific URL.
As for where these email addresses will be stored, you have several options; for one, you can collect them in the Hello Bar “My Contacts” list, or you can create a new contact list and them to your preferred email marketing tool:
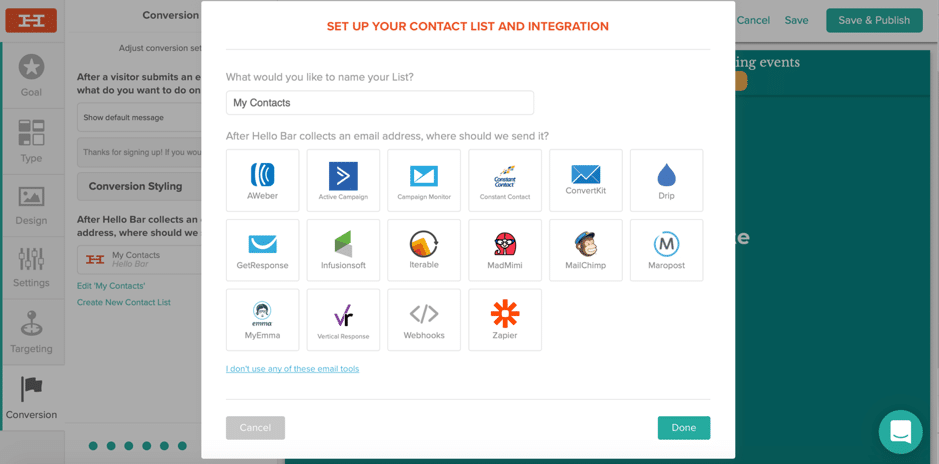
As you can see in the above screenshot, most major email marketing tools work, such as MailChimp, Aweber, Convertkit and Active Campaign. And, if you don’t use any of these tools, you can always collect the email addresses and names using Hello Bar, plus you can connect other tools as well by using Zapier.
And that’s it in terms of designing and customizing your notification! The builder is as straightforward as they come, as it literally takes a few minutes to set up a notification, no matter what type of notification you choose.
When you finish designing your notification, you can also check to see what it would look like not only on desktop, but also on tablets and mobile phones, in order to make sure you’ll convert visitors from any device.
Installing Hello Bar on your website and other useful features
Installing it very easy; there are several options depending on the service you use, as well as your HTML knowledge.
One option is to install it yourself (but you need to know some HTML to do so). Otherwise, if you use WordPress, it takes 3 quick steps to set up: copy your site snippet, get the Hello Bar WordPress plugin (click on Plugins -> Add New and search for Hellobar) and then paste the site snippet once you go to the Hello Bar option in your menu. As for Wix websites, it’s literally as easy as copying and pasting a tracking ID, once you’ve integrated with Wix.
Conclusion
Hello Bar is the no-muss-no-fuss solution that every business needs, not just B2B, but also B2C. It’s perfect for beginners as it’s so easy to use and create notification bars, but advanced users will also appreciate the ease of use and the simplicity of the tool; it focuses on exactly the features you need to generate leads on autopilot, grow your contact list and nurture more leads into becoming your customers – the features every business needs in order to grow.
Get the free trial here and you’ll also get some very useful bonuses beyond the 30-day trial, such as useful templates and an in-depth email marketing course!

Follow Lilach